English


Views: 222 Author: Dream Publish Time: 2025-01-19 Origin: Site


Content Menu
● Understanding Aluminum Wrapping
● Benefits of Aluminum Wrapping
● Step-by-Step Guide to Wrapping Window Trim
>> 1. Measure Your Window Trim
>> 5. Install J-Channel (if necessary)
>> 8. Finish Up
● Maintenance Tips for Wrapped Windows
● FAQ
>> 1. What type of aluminum coil should I use for wrapping windows?
>> 2. Can I wrap my window trim without removing it?
>> 3. How do I maintain my wrapped windows?
>> 4. Is wrapping window trim a DIY project?
>> 5. Can I paint my aluminum-wrapped windows?
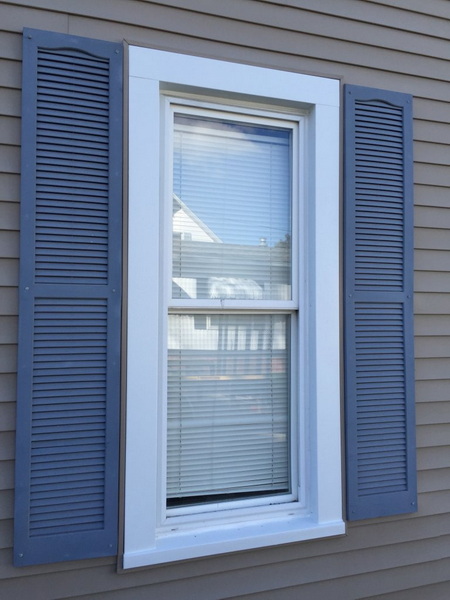
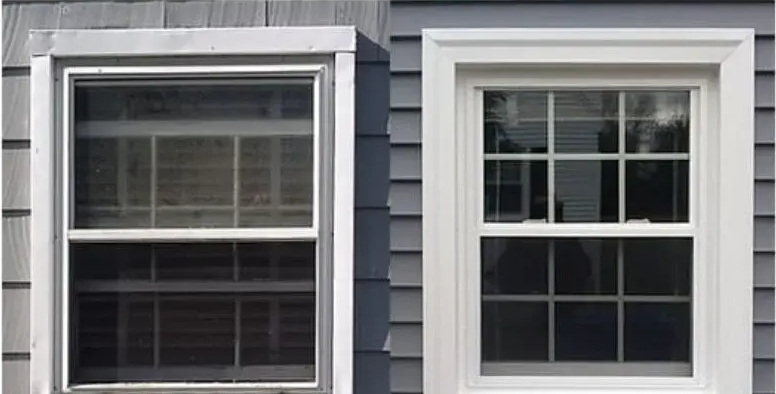
Wrapping window trim with aluminum is a practical and aesthetic choice for homeowners looking to enhance the durability and appearance of their windows. This process not only protects the wood underneath from moisture damage but also provides a clean, modern look. In this comprehensive guide, we will explore the steps involved in wrapping window trim with aluminum, the tools you'll need, and some tips to ensure a successful installation.

Aluminum wrapping involves using aluminum coil stock to cover existing wood trim around windows and doors. This method is popular because aluminum is resistant to rust, rot, and fading, making it an ideal material for exterior applications.
- Durability: Aluminum does not warp or rot like wood, ensuring a longer lifespan for your window trim.
- Low Maintenance: Once installed, aluminum-wrapped trims require minimal upkeep compared to wood trims that need regular painting and sealing.
- Energy Efficiency: Wrapping your window trim can help improve insulation, reducing energy costs by keeping drafts at bay.
- Aesthetic Appeal: Aluminum wraps come in various colors and finishes, allowing you to customize the look of your home while maintaining a modern appearance.
- Increased Property Value: A well-executed aluminum wrap can enhance curb appeal, potentially increasing your home's market value.
Before starting your project, gather the following tools and materials:
- Aluminum coil stock: Available in various colors and finishes.
- Aluminum brake: A tool used to bend the aluminum into shape.
- Measuring tape: For accurate measurements.
- Utility knife: For cutting the aluminum.
- Tin snips: For trimming edges.
- Caulk gun: For applying sealant.
- Nails or screws: To secure the aluminum in place.
- Safety goggles: To protect your eyes while working.
- Level: To ensure that your installation is straight and even.
Start by measuring the dimensions of your window trim. You'll need to measure the height and width of each side of the window, as well as the top and bottom pieces. It's crucial to take accurate measurements to ensure a proper fit.
Using your measurements, cut pieces of aluminum coil stock for each side of the window trim. Remember to add an extra inch to each measurement to allow for bending and securing.
Before applying the aluminum, ensure that the existing wood trim is clean and free from any debris. If necessary, sand down rough edges to create a smooth surface. This step is essential for ensuring proper adhesion and a neat finish.
Using an aluminum brake, bend the aluminum coil according to your measurements. The first bend should be at the inside measurement, followed by bends at the face and outside measurements. This will create a snug fit around your trim.
If you're using J-channel around your window, install it before wrapping with aluminum. The J-channel should be flush against the window frame to create a clean edge. This will also provide a channel for water runoff, preventing moisture from seeping behind the trim.
Starting from one side, position your pre-bent aluminum piece against the trim. Use nails or screws to secure it in place, ensuring that it overlaps with any adjacent pieces for a watertight seal. Be sure to use stainless steel or galvanized fasteners to prevent rusting over time.
Once all pieces are installed, apply caulk along all edges where the aluminum meets wood or other surfaces. This step is critical for preventing water infiltration. Use a high-quality exterior-grade caulk that remains flexible after curing.
Inspect your work for any gaps or areas that may need additional sealing or trimming. Clean up any excess materials and ensure everything is securely fastened.

- Practice bending techniques on scrap pieces of aluminum before working on your actual project.
- Choose high-quality materials to ensure longevity and durability of your wrap.
- Consider weather conditions when planning your installation; avoid working in extreme temperatures or rain.
- Work with a partner if possible; having an extra set of hands can make handling larger pieces of aluminum much easier.
- Inaccurate Measurements: Always measure twice before cutting to avoid wasting material.
- Skipping Sealant Application: Neglecting to caulk edges can lead to water damage over time.
- Improper Bending Techniques: Ensure you're using an aluminum brake correctly; improper bends can result in gaps or poor fits.
- Ignoring Safety Precautions: Always wear safety goggles when cutting or bending metal to protect yourself from sharp edges and flying debris.
Once you've successfully wrapped your window trim with aluminum, it's essential to maintain it properly:
- Regularly inspect for any signs of wear or damage.
- Clean with mild soap and water; avoid abrasive cleaners that could scratch the surface.
- Check caulking periodically; reapply as necessary to maintain a watertight seal.
When choosing colors for your aluminum wrap, consider how they will complement your home's overall exterior design. Darker colors may absorb more heat but can also provide a striking contrast against lighter siding or brickwork.
If you're unsure about which color or finish would work best for your home, consider consulting with a professional who can provide samples and advice tailored to your specific situation.
Wrapping window trim with aluminum is an effective way to enhance both functionality and aesthetics of your home's exterior. With careful planning and execution, you can achieve a professional-looking finish that will protect your windows for years to come while also improving energy efficiency and curb appeal.

Use high-quality aluminum coil that is specifically designed for exterior applications. Look for options that resist fading and corrosion.
Yes, you can wrap existing trim without removing it as long as it is in good condition and securely attached.
To maintain wrapped windows, regularly clean them with soap and water to prevent dirt buildup and check for any signs of damage or wear.
Yes, wrapping window trim can be a DIY project if you have basic carpentry skills and the right tools.
While painting is possible, it's generally not recommended as it can void warranties on pre-finished products. If you want a different color, consider purchasing colored aluminum coil stock instead.
[1] https://www.youtube.com/watch?v=LOEXES8Y3jU
[2] https://www.youtube.com/watch?v=GoTbwfLzBFc
[3] https://www.youtube.com/watch?v=r7fltGlArMU
[4] https://www.youtube.com/watch?v=FtsgvssYwb0
[5] https://www.youtube.com/watch?v=zfQEV0gg0ys
[6] https://www.doityourself.com/stry/aluminum-wrapped-window-wrap-maintenance-tips
[7] https://www.trimbender.com/guides-videos-for-installing-aluminum-trim
[8] https://www.pinterest.com/pin/how-to-aluminum-wrap-trim-detailed-with-tips-and-tricks-youtube--161003755420645915/
Stainless Steel Pipes Vs Galvanized Pipes: Durability And Cost Analysis
Comparing Stainless Steel Pipes And PVC Pipes: What You Need To Know?
Stainless Steel Pipes Vs Copper Pipes: Pros And Cons for Industrial Use
Seamless Stainless Steel Pipes Vs Welded Pipes: Key Differences Explained
Stainless Steel Pipes Vs Carbon Steel Pipes: Which One Suits Your Project?
Stainless Steel Sheets Vs Galvanized Steel Sheets: Pros And Cons Compared
Stainless Steel Sheets Vs Aluminum Sheets: Which One Suits Your Project?
Cold Rolled Vs Hot Rolled Stainless Steel Sheets: Key Differences Explained
How To Choose Stainless Steel for Industrial Guardrails And Railings?
