English


Views: 222 Author: Tomorrow Publish Time: 2025-07-05 Origin: Site


Content Menu
● Why Choose an Aluminum Profile Sim Rig?
● Step 1: Planning and Designing Your Aluminum Profile Sim Rig
>> Choose the Right Aluminum Profile
● Step 3: Preparing for Assembly
>> Tools Needed
>> Workspace
● FAQ
>> 1. What are the advantages of using aluminum profiles for a sim rig?
>> 2. Which aluminum profile size is best for a sim rig?
>> 3. Do I need special tools to build an aluminum profile sim rig?
>> 4. Can I customize the seating position on an aluminum profile sim rig?
>> 5. Where can I buy aluminum profiles and accessories for my sim rig?
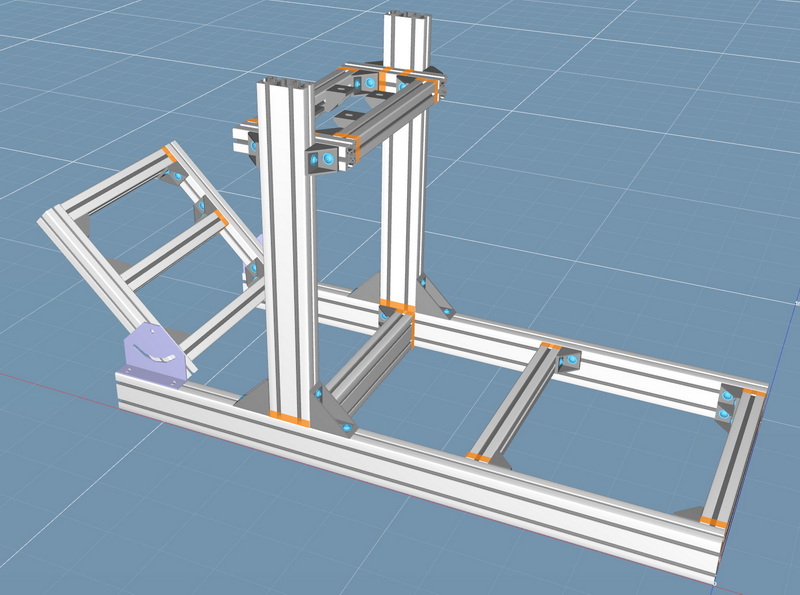
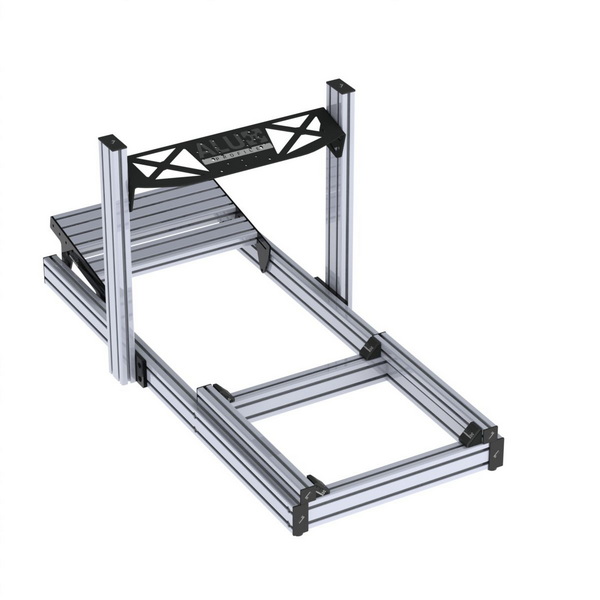
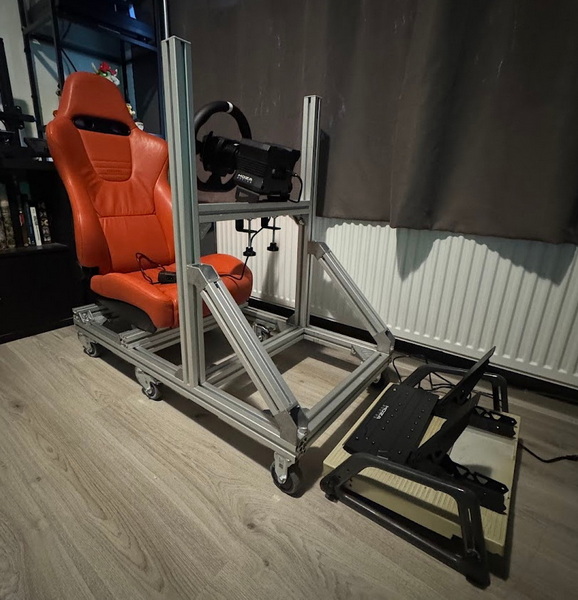
Building a sim rig using aluminum profiles is an excellent choice for sim racing enthusiasts who want a sturdy, customizable, and professional-quality setup without the need for welding or specialized metalworking skills. The modular nature of aluminum extrusion profiles, especially the popular 80/20 series, allows you to design a rig tailored to your exact needs with relative ease. This article will guide you through the entire process of building an aluminum profile sim rig, from design considerations to assembly and finishing touches.

Before diving into the build process, it's important to understand why aluminum profiles are favored in the sim racing community:
- Rigidity and Stability: Unlike wood or PVC, aluminum profiles provide a strong, non-flexing frame essential for serious sim racing.
- Modularity: The T-slot design of aluminum profiles allows easy attachment of brackets, pedals, wheel mounts, and accessories without welding.
- Customization: You can design your rig to fit your body size, preferred seating position, and hardware layout.
- Ease of Assembly: Components are connected using bolts and brackets, making assembly straightforward and adjustable.
- Professional Finish: Aluminum profiles give your rig a clean, industrial look that is both functional and aesthetically pleasing.
- Durability: Aluminum is corrosion-resistant, lightweight, and long-lasting, making it ideal for a rig that will see frequent use.
Start by determining what you want from your sim rig:
- What type of sim racing will you do? (Formula-style, GT, rally)
- What hardware will you mount? (Wheelbase, pedals, shifter, seat)
- What space constraints do you have?
- What is your budget?
- Do you want a fixed or adjustable rig?
- Will you include multiple monitors or VR setups?
Answering these questions will help you create a rig that fits your needs perfectly.
To create a precise design, consider using frame design software such as FrameDesigner from FrameXpert. This tool lets you:
- Choose from different aluminum profile sizes.
- Visualize your rig in 3D.
- Generate a detailed parts list including profiles, brackets, bolts, and accessories.
- Estimate costs based on your region and supplier.
Using software also helps avoid costly mistakes and ensures all parts fit together perfectly.
The most common sizes for sim rigs are:
| Profile Size (mm) | Strength | Typical Use |
|---|---|---|
| 40x40 | Moderate | Smaller, budget rigs |
| 40x80 | Good balance | Mid-range rigs |
| 40x120 | Very sturdy | High-end, professional rigs |
Profiles with larger cross-sections offer more rigidity but come at a higher cost and weight. For most home sim racers, 40x80 profiles strike the best balance.
Ergonomics is crucial for long sim racing sessions. When designing your aluminum profile sim rig:
- Ensure the seat height and distance to pedals and wheel are comfortable.
- Allow for adjustability if possible, such as sliding pedal plates or adjustable seat mounts.
- Position the wheel at a natural arm height to reduce fatigue.
- Plan for monitor placement at eye level to avoid neck strain.
Once your design is finalized, order the following components:
- Aluminum profiles cut to your specified lengths.
- Corner brackets and T-nuts for secure connections.
- Bolts and screws (typically M8 socket head bolts).
- End caps to cover profile ends for safety and aesthetics.
- Optional: Rubber feet for floor protection and stability.
- Optional: Adjustable feet if your floor is uneven.
You can source these from specialized suppliers such as OSR, 1up Engineering, or tnutz.com, which often offer kits or custom cut profiles. Buying pre-cut profiles saves time and ensures accuracy.

- Allen keys or hex drivers (for socket bolts).
- Rubber mallet (to gently tap parts into place).
- Measuring tape and square (to ensure accuracy).
- Optional: Power drill for pilot holes if mounting hardware requires.
- Level to check horizontal surfaces.
Set up a clean, spacious area where you can lay out all parts and assemble the rig comfortably. A large table or open floor space works well.
- Wear gloves to avoid cuts from sharp profile edges.
- Keep your workspace organized to prevent losing small parts.
- Work slowly and methodically to ensure proper alignment.
1. Start with the Base: Assemble the base frame using your longest profiles. Use corner brackets and T-nuts to secure joints tightly. Make sure the base is square by measuring diagonals.
2. Build the Uprights: Attach vertical profiles to support the wheel mount and seat. Use corner brackets or specialized connectors for strength.
3. Add Cross Supports: Install horizontal crossbars to increase frame rigidity and prevent flexing during intense racing.
4. Mounting Points: Attach brackets for pedals, wheelbase, shifter, and seat. Adjust their positions according to your ergonomic preferences.
5. Seat Mounting: Use steel brackets or profile connectors to fix the seat securely. Some builders reuse seats from old gaming chairs or racing seats.
6. Check Alignment: Ensure everything is square and level before fully tightening bolts.
- Use generic steel brackets for custom angles or reclining seat positions.
- Reuse parts from older rigs or chairs to save costs.
- Avoid over-tightening bolts initially; tighten fully after the entire frame is assembled.
- Consider adding rubber feet to prevent slipping and protect floors.
- Label your profiles and parts during assembly to avoid confusion.
- Test fit your hardware (wheelbase, pedals) during assembly to ensure correct placement.
- For the wheelbase, use a sturdy mounting plate attached to the vertical profiles. Ensure it is firmly secured to handle force feedback.
- For pedals, consider a slanted pedal plate for comfort. Attach it to the base with adjustable brackets if possible.
- For the shifter, mount it within easy reach, either on the side or on a dedicated profile extension.
- For the seat, ensure it is firmly bolted to the frame and does not wobble.
- Install end caps on open profile ends to avoid sharp edges and give a clean look.
- Attach cable management clips or ties to keep wiring neat and prevent tangles.
- Add accessories such as button boxes, monitors, or VR mounts as needed.
- Test the rig for comfort and stability during use, making adjustments as necessary.
- Consider painting or anodizing profiles if you want a custom color or finish.
- Add padding or foam in contact areas for extra comfort.
An aluminum profile sim rig is easy to maintain. Periodically check bolts for tightness and clean dust from profiles and hardware. The modular design allows you to upgrade components or expand your rig, such as adding triple monitors, motion platforms, or additional controls.
Building an aluminum profile sim rig is a rewarding project that results in a highly durable, customizable, and professional racing cockpit. By carefully planning your design, selecting the right materials, and assembling with precision, you can create a sim rig that perfectly suits your racing style and hardware setup. The modular nature of aluminum profiles also allows future upgrades and modifications, making it a long-term investment in your sim racing experience. Whether you are a casual racer or a competitive sim driver, an aluminum profile sim rig provides the stability, comfort, and flexibility needed to enhance your performance and enjoyment.

Aluminum profiles provide rigidity, modularity, and a professional finish without requiring welding. They allow easy customization and assembly with standard bolts and brackets.
The 40x80 mm profile offers a good balance of strength and cost for most users. For maximum rigidity, 40x120 mm profiles are preferred, especially for larger or professional rigs.
No specialized metalworking tools are needed. Basic tools like Allen keys, measuring tape, and a rubber mallet are sufficient for assembly.
Yes, the modular design allows you to adjust seat angles and positions using brackets and different profile lengths to achieve your preferred ergonomics.
You can purchase them from specialized suppliers such as OSR, 1up Engineering, tnutz.com, or local hardware stores that stock T-slot aluminum extrusion systems.
Seven Requirements for External Doors And Windows of Passive Rooms
How Much Do You Know about The Design Standards for Aluminum Alloy Door And Window Dimensions?
Welding Vs Stainless Steel Fabrication: Understanding The Manufacturing Process Differences
Stainless Steel Fabrication Vs Powder Coated Steel: Durability And Cost Comparison
CNC Machining Vs Stainless Steel Fabrication: Pros And Cons for Industrial Use
Stainless Steel Fabrication Vs Carbon Steel Fabrication: Key Differences Explained
Stainless Steel Fabrication Vs Aluminum Fabrication: Which Is Right for Your Project?
Stainless Steel Grades 201 Vs 304: Cost Vs Performance Breakdown
316L Vs 316 Stainless Steel Grades: Which Is Better for Corrosion Resistance?
Comparing Austenitic Vs Martensitic Stainless Steel Grades: What You Need To Know?
