English


Views: 222 Author: Dream Publish Time: 2025-01-08 Origin: Site


Content Menu
● Understanding Single Hung Windows
● Step-by-Step Guide to Remove the Bottom Sash
>> Step 1: Prepare the Workspace
>> Step 2: Locate the Take-Out Clips
>> Step 3: Remove Take-Out Clips
>> Step 5: Lift and Disengage the Sash
● Reinstalling the Bottom Sash
>> Step 1: Positioning the Sash
>> Step 2: Insert and Lock in Place
>> Step 3: Secure Take-Out Clips and Sash Stops
● Maintenance Tips for Single Hung Windows
● Troubleshooting Common Issues During Sash Removal
● FAQs
>> 1. What tools do I need to remove a single hung window sash?
>> 2. Can I remove my window sash without professional help?
>> 3. How often should I clean my window sashes?
>> 4. What should I do if my window sash gets stuck?
>> 5. Is it necessary to replace any parts after removing my window sash?
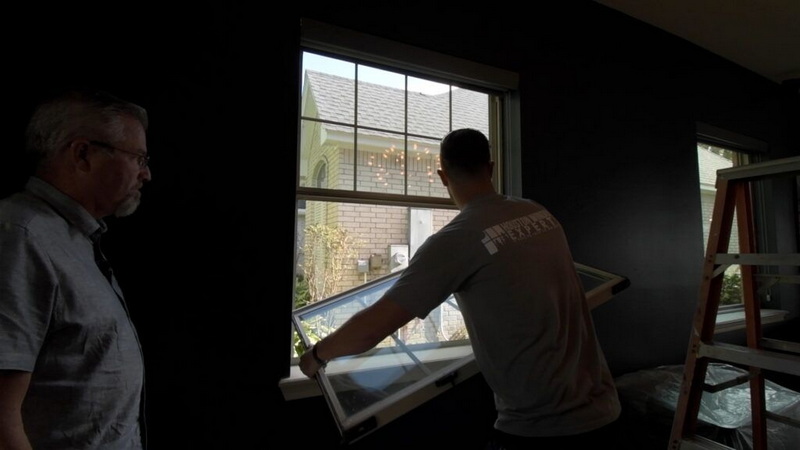
Removing the bottom sash from a single hung aluminum window can seem daunting, but with the right tools and a clear understanding of the process, it can be accomplished easily. This guide will walk you through each step, ensuring that you can perform this task efficiently.

Before beginning, gather the following tools and materials:
- Flathead screwdriver
- Safety glasses
- Work gloves
- Optional: Lubricant for tracks (if needed)
Single hung windows consist of two sashes: the top sash is fixed, while the bottom sash is movable. This design allows for ventilation while maintaining a sleek appearance. Knowing how these components interact is essential for effective removal.
1. Ensure that the area around the window is clear of obstacles.
2. Put on safety glasses and gloves to protect yourself during the process.
1. Identify the take-out clips: These are typically located on both sides of the window frame.
2. Ensure that the bottom sash is completely closed before proceeding.
1. Using a flathead screwdriver, carefully pry up each take-out clip at a 45-degree angle.
2. Make sure to do this for both sides of the sash.
1. Locate the sash stops at the top corners of the window frame.
2. Use your screwdriver to remove these stops carefully.
1. With both clips removed and sash stops out, pull upward on the bottom sash until you feel it disengage from its balance system.
2. Continue lifting until you can see the bottom of the balancers.
1. Once disengaged, slide the sash to one side to remove it from its track.
2. Be cautious not to damage any components as you remove it.

After cleaning or performing maintenance, reinstalling the bottom sash is just as straightforward:
1. Hold the sash above the bottom balancer.
2. Align it carefully with its track.
1. Gently lower one side of the sash into its balance shoe, followed by the other side.
2. Work back and forth until both sides are securely in place.
1. Push down on both take-out clips to lock them in place.
2. Reinsert sash stops at the top corners.
Regular maintenance can help extend the life of your windows and ensure they operate smoothly:
- Clean Tracks Regularly: Dirt and debris can accumulate in window tracks, making it difficult for sashes to move freely. Use a soft brush or vacuum attachment to clean these areas regularly.
- Lubricate Moving Parts: Applying a silicone-based lubricant to tracks and moving parts will help prevent sticking and ensure smooth operation.
- Inspect Weatherstripping: Check weatherstripping for wear or damage. Replacing worn weatherstripping can improve energy efficiency by reducing drafts.
- Check Balance Springs: If your window sash feels heavy or difficult to lift, inspect balance springs for wear or damage. Replacing them may restore proper function.
If you encounter problems during removal, consider these tips:
- Stuck Sashes: If your window sashes are stuck, check for any obstructions in their track or ensure that all take-out clips are properly disengaged before attempting removal again.
- Broken Glass: If you find broken glass during sash removal, wear safety gloves and use a glass cutter to score any remaining glass before carefully removing shards.
Removing and reinstalling a bottom sash from a single hung aluminum window is a manageable task with proper preparation and attention to detail. Following these steps will ensure that your windows remain functional and visually appealing while also allowing for necessary maintenance.

You will need a flathead screwdriver, safety glasses, and gloves for protection.
Yes, removing a single hung window sash can be done safely by following step-by-step instructions as outlined in this guide.
It is advisable to clean your window sashes at least once or twice a year to maintain their functionality and appearance.
If your window sash is stuck, check for any obstructions in its track or ensure that all take-out clips are properly disengaged before attempting removal again.
Typically, no parts need replacing unless they are damaged during removal or installation; however, it's good practice to inspect all components for wear.
[1] https://advancedwindowsusa.com/how-to-remove-single-hung-windows-for-cleaning
[2] https://windowhardwaredirect.com/blogs/news/essential-guide-to-bottom-window-sash-replacement-step-by-step-instructions-for-homeowners
[3] https://www.viwinco.com/how-to-remove-a-window-sash/
[4] https://www.youtube.com/watch?v=FK59KzlmQ2g
[5] https://www.youtube.com/watch?v=Roi2b3tMizA
[6] https://windowhardwaredirect.com/blogs/news/a-step-by-step-guide-on-how-to-remove-double-hung-window-sashes-effectively
[7] https://www.youtube.com/watch?v=CvdSD5jZV3o
[8] https://www.youtube.com/watch?v=QmrsOMNIO4Q
[9] https://www.youtube.com/watch?v=9YnGOdSISY8
Stainless Steel Grades 201 Vs 304: Cost Vs Performance Breakdown
316L Vs 316 Stainless Steel Grades: Which Is Better for Corrosion Resistance?
Comparing Austenitic Vs Martensitic Stainless Steel Grades: What You Need To Know?
Stainless Steel 430 Vs 304: Key Differences Explained for Manufacturers
304 Vs 316 Stainless Steel Grades: Which One Suits Your Project Best?
Stainless Steel Pipes Vs Galvanized Pipes: Durability And Cost Analysis
Comparing Stainless Steel Pipes And PVC Pipes: What You Need To Know?
Stainless Steel Pipes Vs Copper Pipes: Pros And Cons for Industrial Use
Seamless Stainless Steel Pipes Vs Welded Pipes: Key Differences Explained
Stainless Steel Pipes Vs Carbon Steel Pipes: Which One Suits Your Project?
