English


Views: 222 Author: Tomorrow Publish Time: 2025-07-05 Origin: Site


Content Menu
● Introduction to DIY Aluminum Profile Sim Rig
● Essential Materials for Building a DIY Aluminum Profile Sim Rig
>> 2. Fasteners and Connectors
>> 3. Mounting Plates and Brackets
● Why Choose Aluminum Profiles for Your Sim Rig?
● Step-by-Step Overview of Building Your DIY Aluminum Profile Sim Rig
● Additional Tips for a Successful DIY Aluminum Profile Sim Rig Build
● FAQ
>> 1. What size aluminum profiles are best for a DIY sim rig?
>> 2. Can I build a sim rig without welding if I use aluminum profiles?
>> 3. What tools do I need to build a DIY aluminum profile sim rig?
>> 4. How do I mount pedals and steering wheels on an aluminum profile rig?
>> 5. Is aluminum profile better than wood or steel for sim rigs?
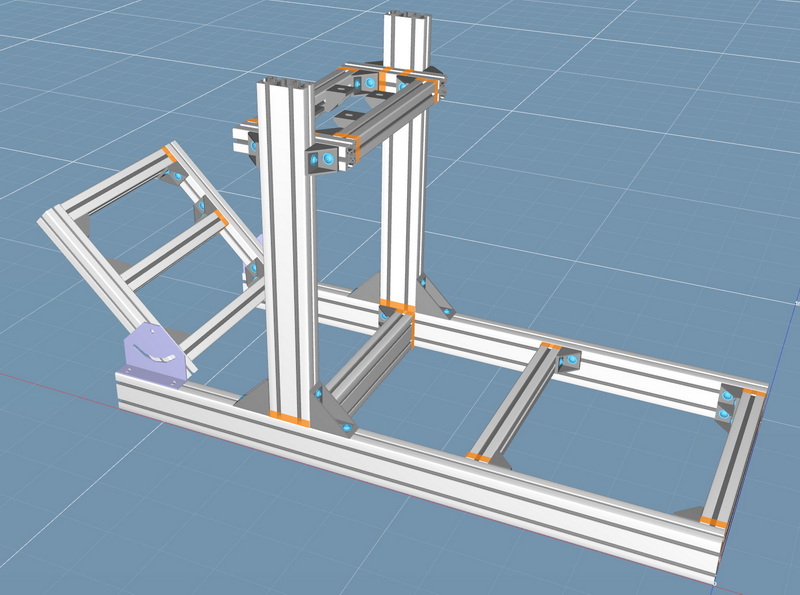
Building a DIY aluminum profile sim rig is an exciting project for sim racing enthusiasts who want a sturdy, customizable, and lightweight frame for their racing setup. Aluminum profiles offer excellent rigidity and modularity, making them ideal for constructing sim rigs that can be adapted to personal preferences and future upgrades. This article will guide you through the essential materials and components needed to build a high-quality DIY aluminum profile sim rig.

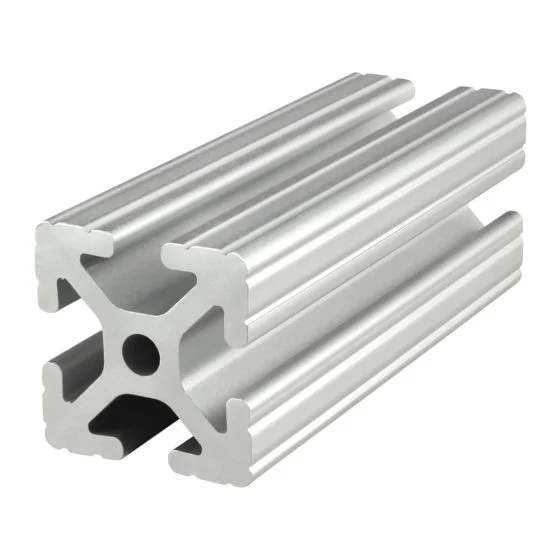
A DIY aluminum profile sim rig is a racing simulator frame constructed primarily from aluminum extrusions. These extrusions are typically T-slot profiles that allow easy assembly and modification without welding or complex fabrication. The aluminum profile system provides strength, flexibility, and a professional finish, making it a popular choice among sim racers.
Sim racing rigs need to be strong enough to hold the steering wheel, pedals, and seat securely while withstanding the forces generated during intense racing sessions. Aluminum profiles provide the perfect balance of strength and lightness, allowing for a solid feel without making the rig cumbersome or difficult to move.
The backbone of any DIY aluminum profile sim rig is the aluminum extrusion itself. Commonly used profiles include:
- 40x40 mm or 40x80 mm T-slot aluminum extrusions: These sizes offer a good balance between strength and weight.
- 80x40 mm or 120x40 mm profiles: For parts of the rig requiring extra rigidity, such as the base or wheel mount area.
You can purchase these profiles in various lengths and cut them to size according to your rig design. Some builders opt for offcuts or marketplace deals to reduce cost without compromising strength.
Aluminum profiles are typically made from 6063-T5 alloy, which provides excellent corrosion resistance and durability. The T-slot design allows you to slide in fasteners and accessories anywhere along the profile, giving you immense flexibility in positioning components.
Aluminum profiles are assembled using specialized fasteners that fit into the T-slots:
- T-nuts: Slide into the profile slots to provide threaded anchor points.
- Socket head cap screws (e.g., M8x16 DIN 912 bolts): Used to secure profiles and brackets.
- Corner brackets and gussets: For reinforcing joints and ensuring frame stability.
- End caps: To cover open profile ends for a clean look and safety.
Choosing the right fasteners is crucial because they hold the frame together and maintain rigidity. Using corner brackets at key joints prevents twisting or flexing during use. End caps not only improve the aesthetic but also prevent dirt and debris from entering the hollow profiles.
To attach sim racing components such as the steering wheel, pedals, and seat, you will need:
- Wheel deck brackets: Custom or pre-made plates designed to hold the steering wheel securely.
- Pedal mounts: Adjustable plates or brackets that allow positioning of pedals at ergonomic angles.
- Seat mounts: Rails or brackets to fix a racing seat firmly to the frame.
Many sim racers prefer to use aluminum or steel plates for mounting pedals and wheels because they provide a solid base and can be drilled or modified to fit various hardware. Adjustable mounts allow you to fine-tune your seating and pedal position for maximum comfort and control.
Building a DIY aluminum profile sim rig requires some basic tools:
- Allen wrenches/hex keys: For tightening screws and bolts.
- Measuring tape and square: To ensure accurate cuts and alignment.
- Saw or cutting tool: If profiles are not pre-cut.
- Drill and bits: For making holes to mount accessories or add custom features.
- Rubber mallet: To gently tap connectors into place without damaging the profiles.
Having the right tools ensures your build is precise and secure. A miter saw with an aluminum cutting blade is ideal for clean cuts. A drill press can be useful for accurate hole placement on mounting plates.
To enhance the rig's functionality and aesthetics, consider:
- Rubber feet or pads: To prevent slipping and protect floors.
- Cable management clips or sleeves: For tidy wiring of pedals, wheel, and displays.
- Quick-release mounts: For steering wheels or other peripherals for easy swapping.
- Motion system mounts: If you plan to add motion capabilities in the future.
Cable management is often overlooked but is essential for a clean, professional setup. Rubber feet reduce vibrations and protect your floor from scratches. Quick-release mounts are especially useful if you use multiple wheels or want to transport your rig.

Aluminum profiles are preferred because they combine lightweight construction with high rigidity, which is crucial for a sim rig that must withstand vigorous use without flexing. Unlike wood or steel, aluminum profiles are corrosion-resistant and allow easy customization with modular connectors. You can expand or modify your rig as your sim racing setup evolves.
Additionally, aluminum profiles are relatively easy to work with. Unlike steel, which requires welding and heavy machinery, aluminum profiles can be cut with simple tools and assembled with hand tools. This makes the DIY aluminum profile sim rig accessible to hobbyists without advanced fabrication skills.
The modularity of aluminum profiles means you can disassemble and reconfigure your rig as needed. This is especially beneficial if you move houses or want to upgrade components without rebuilding from scratch.
1. Design your rig layout: Plan the dimensions and positioning of the seat, pedals, and wheel. Consider ergonomics and space constraints.
2. Select and purchase aluminum profiles: Choose profile sizes based on the structural needs of each section.
3. Cut profiles to length: Use precise measurements to ensure a perfect fit.
4. Assemble the frame: Use T-nuts, bolts, and corner brackets to connect the profiles.
5. Mount accessories: Attach pedal plates, wheel mounts, and seat rails.
6. Add finishing touches: Install end caps, rubber feet, and cable management solutions.
During assembly, it's important to check for square corners and level surfaces to ensure your rig feels solid and comfortable. Test fit your components before fully tightening fasteners to allow for adjustments.
- Plan for adjustability: Incorporate sliding mounts or adjustable brackets so you can fine-tune your seating and pedal positions.
- Consider ergonomics: Your rig should support a natural driving posture to reduce fatigue during long sessions.
- Account for cable routing: Plan channels or clips to keep cables out of the way and prevent snagging.
- Use quality fasteners: Cheap hardware can loosen over time, so invest in good bolts and nuts.
- Test rigidity periodically: Tighten all connections after initial assembly and after a few uses to maintain stability.
Building a DIY aluminum profile sim rig requires careful selection of materials to ensure strength, flexibility, and comfort. The key materials include aluminum T-slot profiles, specialized fasteners, mounting brackets, and the right tools for assembly. This approach allows sim racers to create a personalized, durable rig that can be upgraded over time. Aluminum profiles provide an excellent combination of light weight and rigidity, making them the ideal choice for a professional-grade sim rig. With proper planning and tools, anyone can build a high-quality sim rig that enhances their racing experience.

The most common sizes are 40x40 mm and 40x80 mm for general frame construction. For areas requiring extra strength, such as the base or wheel mount, 80x40 mm or 120x40 mm profiles are recommended.
Yes. One of the main advantages of using aluminum profiles is that they can be assembled with T-nuts and bolts without welding, making the build process simpler and more accessible.
Basic tools include Allen wrenches, a measuring tape, a saw for cutting profiles, a drill for mounting holes, and a rubber mallet for assembly.
You need mounting plates or brackets designed to fit the profiles. These plates can be bolted onto the frame and allow adjustable positioning for pedals and wheels.
Aluminum profiles offer better strength-to-weight ratio, corrosion resistance, and modularity compared to wood or steel, making them a superior choice for customizable and durable sim rigs.
Seven Requirements for External Doors And Windows of Passive Rooms
How Much Do You Know about The Design Standards for Aluminum Alloy Door And Window Dimensions?
Welding Vs Stainless Steel Fabrication: Understanding The Manufacturing Process Differences
Stainless Steel Fabrication Vs Powder Coated Steel: Durability And Cost Comparison
CNC Machining Vs Stainless Steel Fabrication: Pros And Cons for Industrial Use
Stainless Steel Fabrication Vs Carbon Steel Fabrication: Key Differences Explained
Stainless Steel Fabrication Vs Aluminum Fabrication: Which Is Right for Your Project?
Stainless Steel Grades 201 Vs 304: Cost Vs Performance Breakdown
316L Vs 316 Stainless Steel Grades: Which Is Better for Corrosion Resistance?
Comparing Austenitic Vs Martensitic Stainless Steel Grades: What You Need To Know?
